一、创建用户组及用户
|
1 2 3 4 |
[root@template ~]# groupadd oinstall [root@template ~]# groupadd dba [root@template ~]# useradd -g oinstall -G dba oracle [root@template ~]# passwd oracle |
二、创建安装目录
|
1 2 3 4 5 6 7 8 9 10 |
[root@template ~]# mkdir /oracle [root@template ~]# lvcreate -L 20G -n lv_oracle vg0 [root@template ~]# mkfs.ext4 /dev/vg0/lv_oracle [root@template ~]# vim /etc/fstab 添加一行: /dev/mapper/vg0-lv_oracle / ext4 defaults 1 1 [root@template ~]# mount /dev/vg0/lv_oracle /oracle [root@template ~]# mkdir -p /oracle/product/11.2/db_1 [root@template ~]# chown -R oralce:oinstall /oracle |
三、安装
直接运行解压后的runInstaller。
关于oracle 安装介质的说明:
http://bananalighter.com/oracle-installer-7-zips/
四、环境变量
|
1 2 3 4 5 6 7 8 9 |
[root@template ~]# vim /home/oracle/.bash_profile 添加: # User specific environment and startup programs export ORACLE_BASE=/oracle export ORACLE_HOME=$ORACLE_BASE/product/11.2/db_1 PATH=$PATH:$HOME/bin:$ORACLE_HOME/bin export PATH |
五、TNS
|
1 2 3 4 5 6 7 8 9 10 11 12 |
mkdir -p $ORACLE_HOME/network/admin cd $ORACLE_HOME/network/admin vi tnsnames.ora 添加如下内容并且保存 ODS18 = (DESCRIPTION = (ADDRESS = (PROTOCOL = TCP)(HOST = ip)(PORT = 1521)) (CONNECT_DATA = (SERVER = DEDICATED) (SERVICE_NAME = haha) ) ) |
六、血泪教训
就不要像下面这样屌屌的自己选择自定义安装了,出各种奇怪的错。
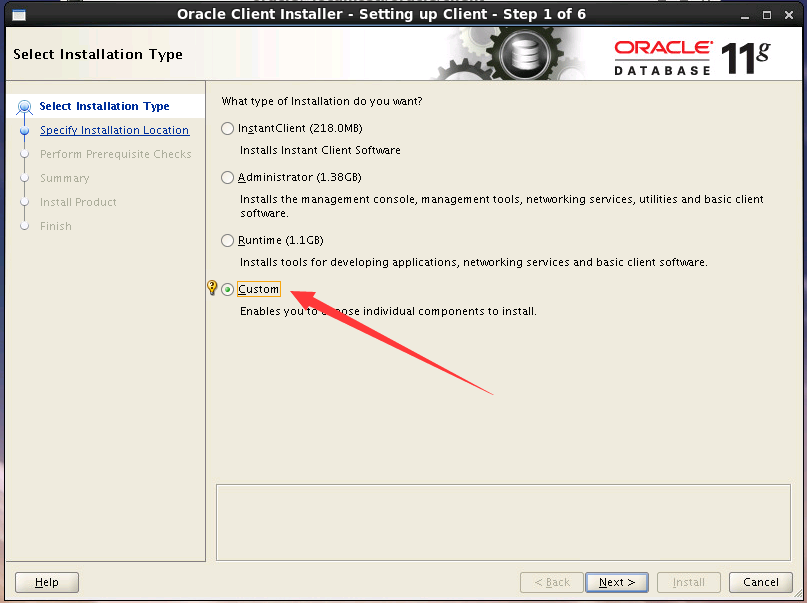
老老实实的打包安装,或者自己单独装以下三个包:
oracle-instantclient-basic-10.2.0.5-1.x86_64.rpm
oracle-instantclient-sqlplus-10.2.0.5-1.x86_64.rpm
oracle-instantclient-devel-10.2.0.5-1.x86_64.rpm
参考:http://blog.sina.com.cn/s/blog_4ed7040c01011xv6.html